Affinity Designer Pen and Node Tools Tutorial
As with any vector art program, you need to be comfortable with creating and manipulating Bézier curves. In Affinity Designer, the pen and node tools are the way to do that.
Understanding Bezier Curves
Bézier curves are used in vector art programs like Affinity Designer and Adobe Illustrator to model smooth curves.
The basic idea is that you can describe any curve using four points in space:
- the starting point
- the end point
- the control point for the starting point
- the control poing for the ending point
For a straight line, you only need the start and end points, like this:

There are no control points here, since we don't need any.
Let's look at an actual curve.

You change the shape of the curve by moving the control points. The curve bends toward the control point. The farther away the point is, the more the curve bends. For example, if we move the control point attached to the start point, we can get something like this:

Here are the control points in action:

How exactly does the software draw the curve? Wikipedia has a great animation:

There's a ton of math involved, but you don't need to know the equations to create the curves you want.
Types of Nodes
In Affinity Designer, there are three kinds of nodes:
- sharp nodes
- smooth nodes
- smart nodes
Sharp Nodes
Sharp nodes are either the end of a line or have a sharp angle. The nodes themselves are shown as squares.

The node on the bottom is a sharp node, even though it has two control points that create two curves. Since those curves don't join in a smooth swoop, but rather at an angle, the node is a sharp node.
Essentially, any time the two control points aren't joined by a straight line, you have a sharp node.
Smooth Nodes
Here's an example of a sharp node (on top) and a smooth node (on bottom).

As you can see, the control points of a smooth node are joined by a single straight line. Smooth nodes are represented by circles.
Smart Nodes
Smart nodes are simply smooth nodes where Affinity Designer controls how they look instead of you. They're represented by a circle with a dot in them.
In the animation below, a user creates several points and Affinity Designer draws curves between them using smart nodes.

We'll look more at smart nodes later.
Pen Tool
Use the pen tool to create curves and to transform sharp nodes into smooth nodes.
To start using the pen tool, either select the icon from the toolbar ![]() or press
or press P.
(I strongly recommend learning the keystrokes for any graphic design program you use regularly: it can make a huge difference in your productivity.)
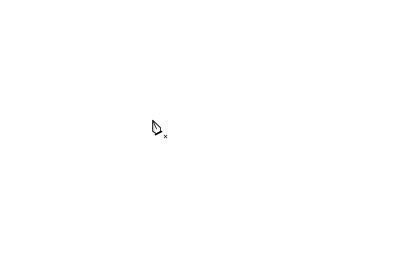
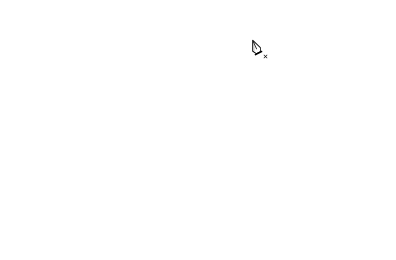
Move the cursor to your document, and you'll see the pen icon with a little "x" below it. That "x" tells you that you're about to create a new curve.
Creating a Curve
To create a curve, simply select the pen tool and start clicking around your document. You'll see something like this:

While there's nothing curvy about this shape, it's still known as a "curve" in the vector art world.
The node with the red square is where the next line will be drawn from. As you click around, the red square follows you.
Closing a Curve
To close a curve, click on the first node you created. When you hover over that node, a little circle will appear beneath the pen. That circle tells you that you're about to close the curve.

Drawing a Smooth Curve
Fortunately, you can create a smooth curve with your pen tool. When you're drawing your curve, click and drag on your nodes instead of simply clicking (which we've been doing up until now.)
You can also create a curve with all sharp nodes, and change those to smooth nodes with the pen tool.
Converting from Sharp Nodes to Smooth
When you hover over a node that's part of a closed curve, you'll see a little slash appear beneath the pen icon.

Converting from Smooth Nodes to Sharp
If you want to change a node from being smooth to sharp, i.e., removing its control points, you can option-click ⌥-click on a node.

Pen Tool Modes
The pen tool has four different modes:
- Pen mode
- Smart Mode
- Polygon Mode
- Line Mode
Pen Mode

So far, we've been using the Pen Mode, which means we can create both sharp and smooth points.
Smart Mode
The smart mode button is next to pen mode:

In Smart Mode, Affinity Designer decides how smooth your curves should be.
Smart nodes are circles with little dots in them. You saw these earlier in the article.
Polygon Mode
Next to smart mode is polygon mode.
![]()
In polygon mode, you can only create sharp nodes. No smooth curves in polygon mode.

When you create a curve in pen mode, clicking and dragging will create a smooth node. but in polygon mode, clicking and dragging simply moves a sharp node around.
Line Mode
In line mode, you can't create a closed curve; only lines.
![]()
You can create lines by both clicking and dragging, or by clicking twice (once for each end point).
Here's how you use it:

Notice that it's impossible to create a closed curve in line mode. After you create the end point, the pen becomes ready to draw a new line.
Node Tool
Once you've created your curve with the pen tool, it's time to fine-tune it with the node tool. You'll find the node tool icon on the toolbar, right underneath the Move tool.
![]()
You can also just press A.
Selecting Nodes
There are several ways to select nodes on a curve.
Selecting a Single Node
Hover over a node. You'll see the cursor change from a white arrow to a black arrow. Then click, and you've selected that node.

Selecting Multiple Nodes
Often, you'll want to manipulate more than one node at a time.
Selecting One at a Time
To add nodes one at a time, hold down the shift key when you click (⇧ - click).

Selecting Several at Once
To select a number of nodes at once, draw a rectangle around them.

Deselecting Nodes
To deselect nodes, hold down the control key (⌃) and draw a rectangle around the nodes you want to deselect.

Moving Nodes
Once your nodes are selected, you can move them with the mouse or the arrow keys.
You can also shift-click (⇧-click) to select multiple nodes at once.

Adding a Node
To add a node to an existing curve, just click on that line with the node tool.

Curving a Straight Line
Affinity Designer can a great feature that lets you easily create a curved line from a straight one. It doesn't give you a ton of control, but I've found it to be quite handy.
Place the node tool over a straight part of a curve. You'll be a little squiggle underneath the tool icon. Click and hold, and create a curve.

Adjusting Control Points
To adjust control points, click on a node and move the control points that appear.
For smooth points, if you change the angle, this will move both points. However, if you just make the line shorter or longer, the other point won't be affected.
Here's what I mean:

But what if you want to move only one of the control points, not both at the same time? In that case, hold down the option key (⌥) when you select a control point.

You can also constrain your control points by holding down the shift key (⇧) when you move them.

Converting a Smooth Node to a Sharp Node
If you've decided that smooth curve just isn't working, you can turn a smooth node into a sharp one without any control points. Simply option-click (⌥ - click) the smooth node.

Deleting a Node
To delete a node, simply select it and press delete.

Congratulations! You now have all you need to know about the mechanics of the pen and node tools in Affinity Designer. Go forth and make great art.